2016年8月19日
- EV3技術情報
- LabVIEW
- ソフトウェア
EV3間のBluetooth通信方法について
2台のEV3間でBluetooth通信する、基本的なLabVIEWのプログラムについて紹介します。
なおここで紹介するプログラムは、LabVIEW for LEGO MINDSTORMS 2012で動作を確認したものです。
◇準備
EV3を2台用意し、それぞれ名前をつけます。
ここでは「EV3A」と「EV3B」とします。
(名前の変更方法はこちらをご覧ください。)
次に、以下の手順にそってペアリングします。
![]() と書かれた手順は
と書かれた手順は![]() のみで、
のみで、 ![]()
![]() と書かれた手順は両方のEV3で操作します。
と書かれた手順は両方のEV3で操作します。
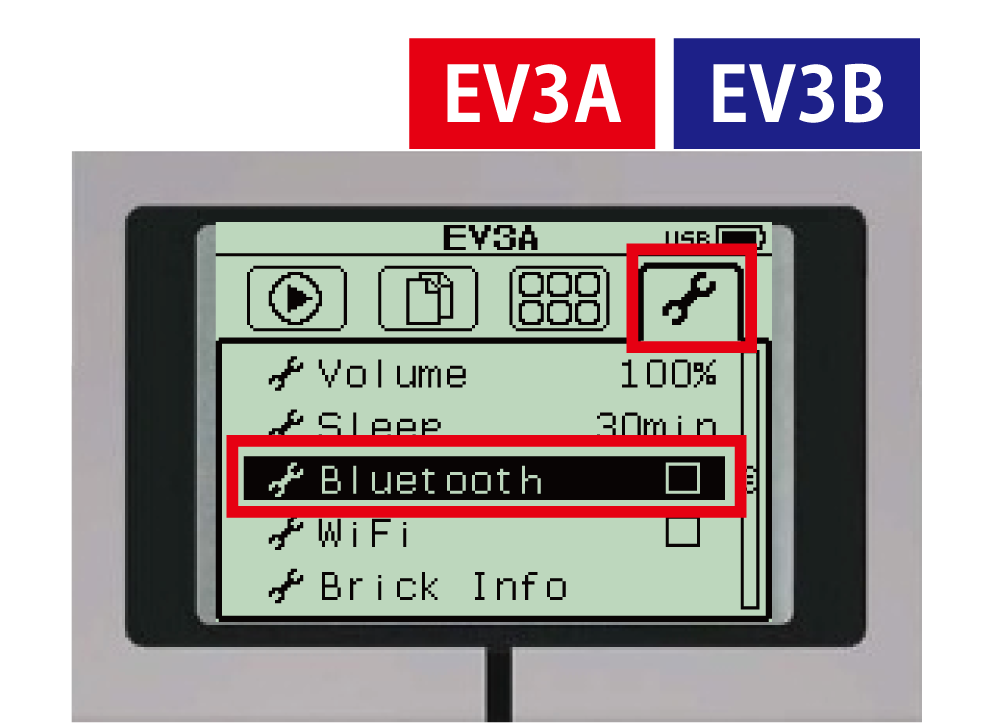
①EV3のセッティングタブ(スパナマーク)の中の「Bluetooth」を開く。
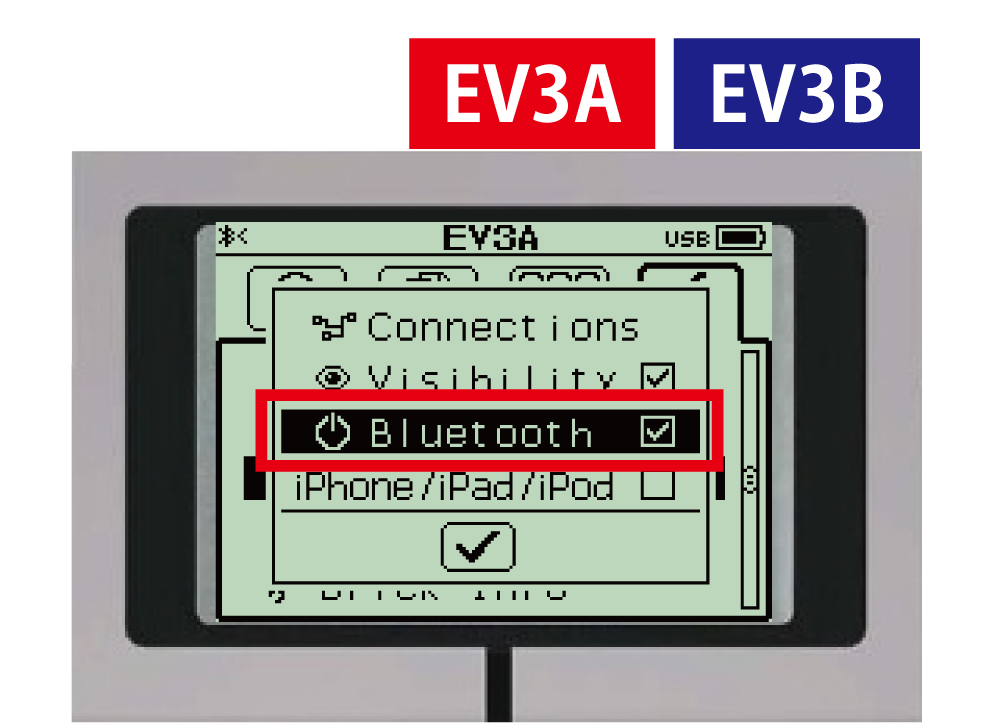
②「Visibility」と「Bluetooth」にチェックを入れる。
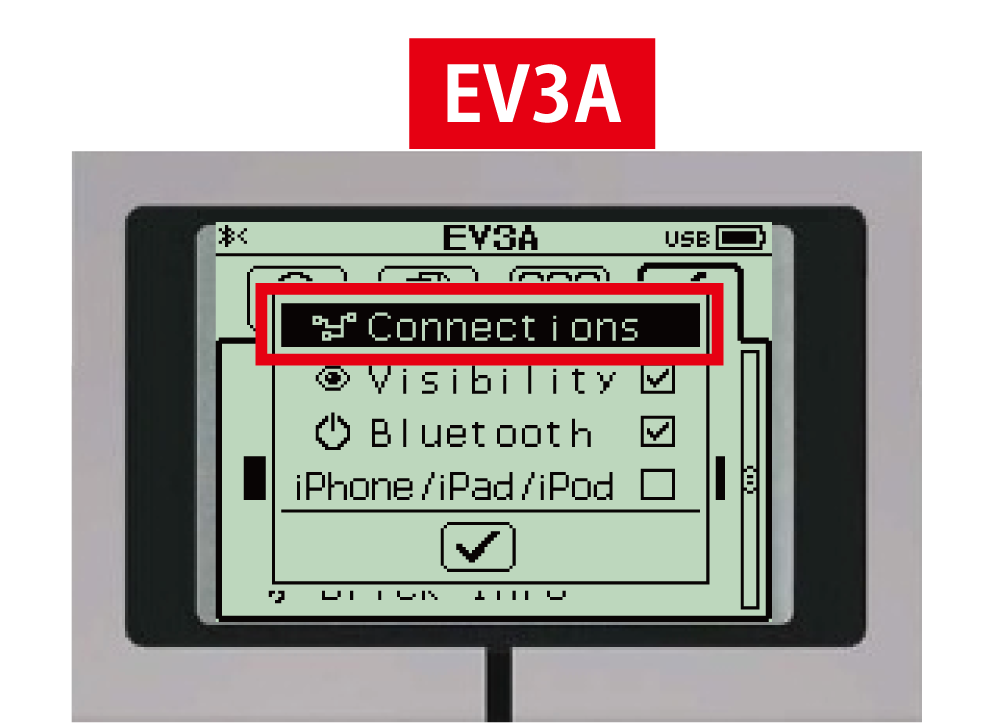
③「Connections」を選択する。
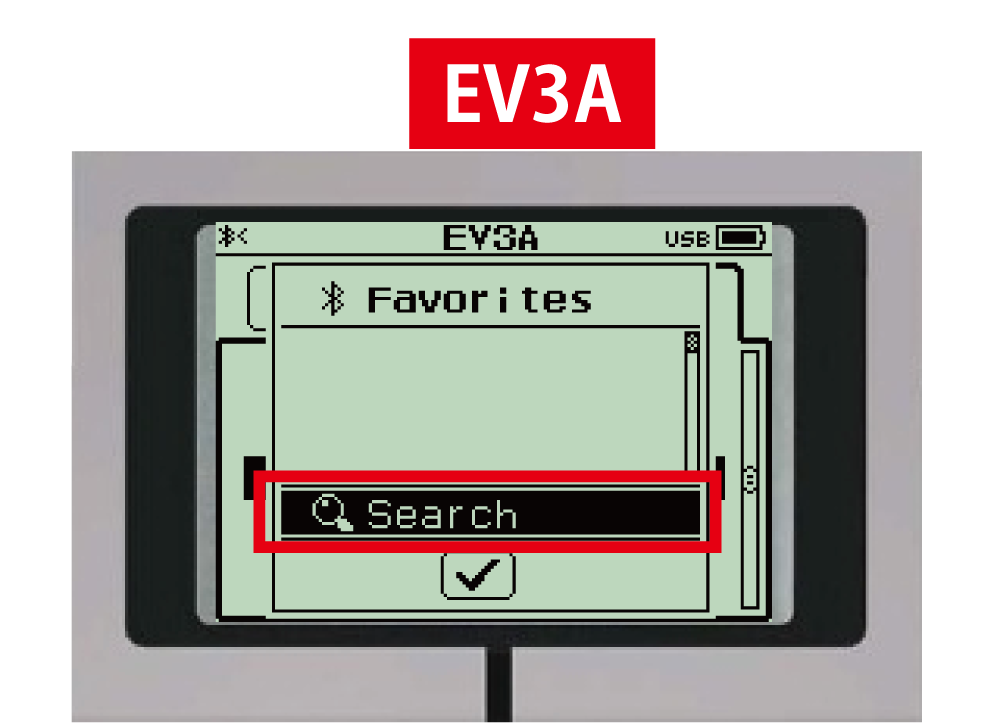
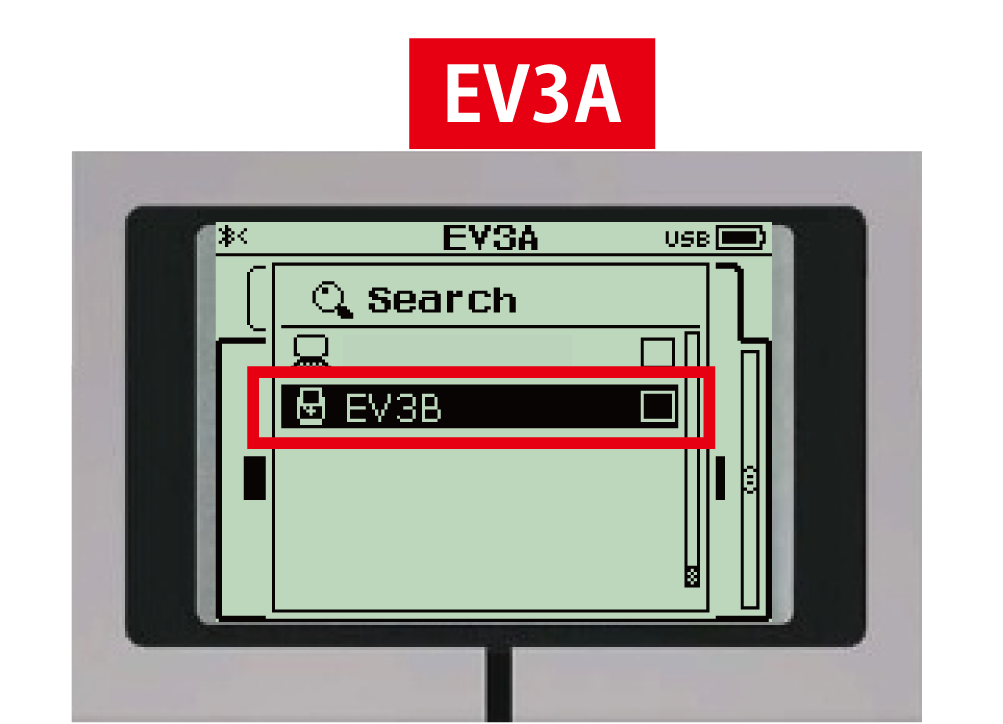
④「Search」を選択する。
⑤検出された「EV3B」を選択する。
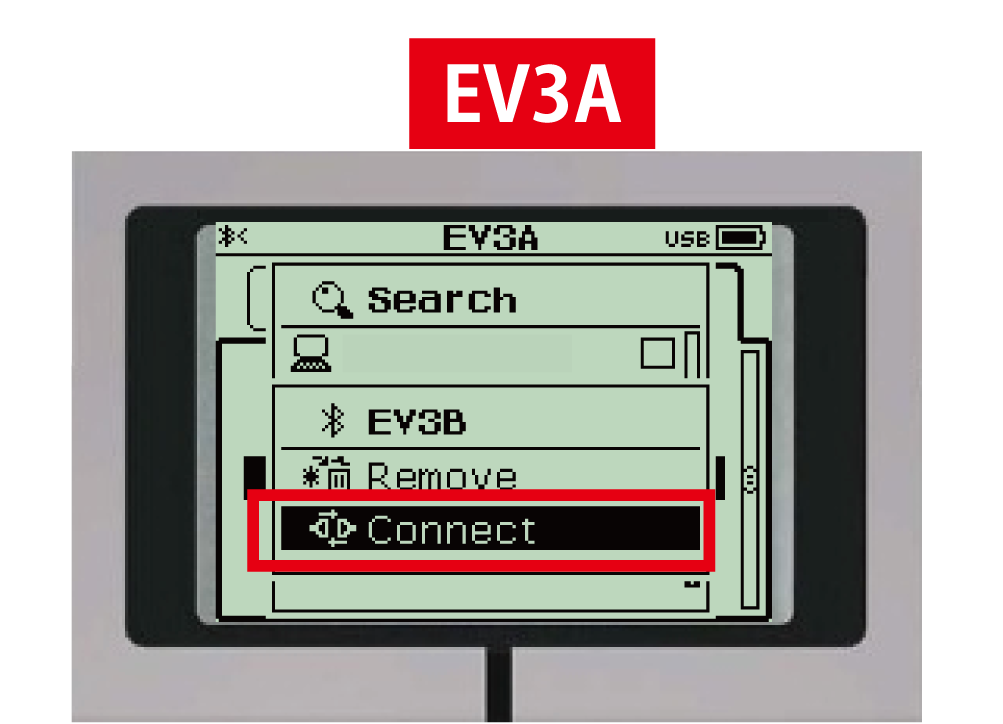
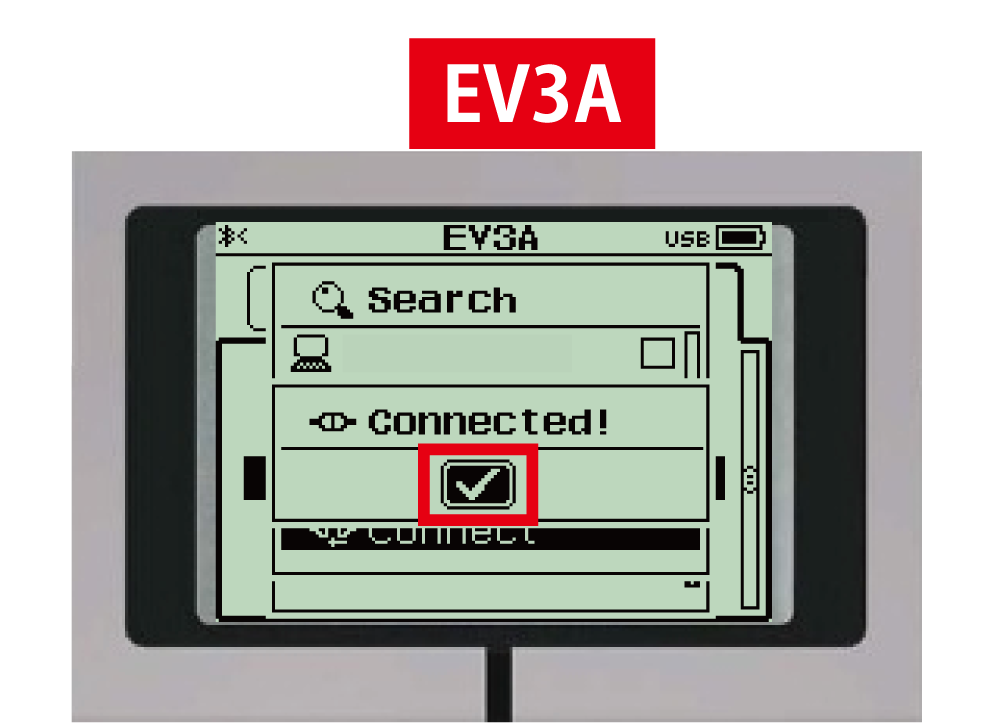
⑥「Connect」を選択する。
⑦接続確認メッセージが表示されたら「✓」を選んで
決定する。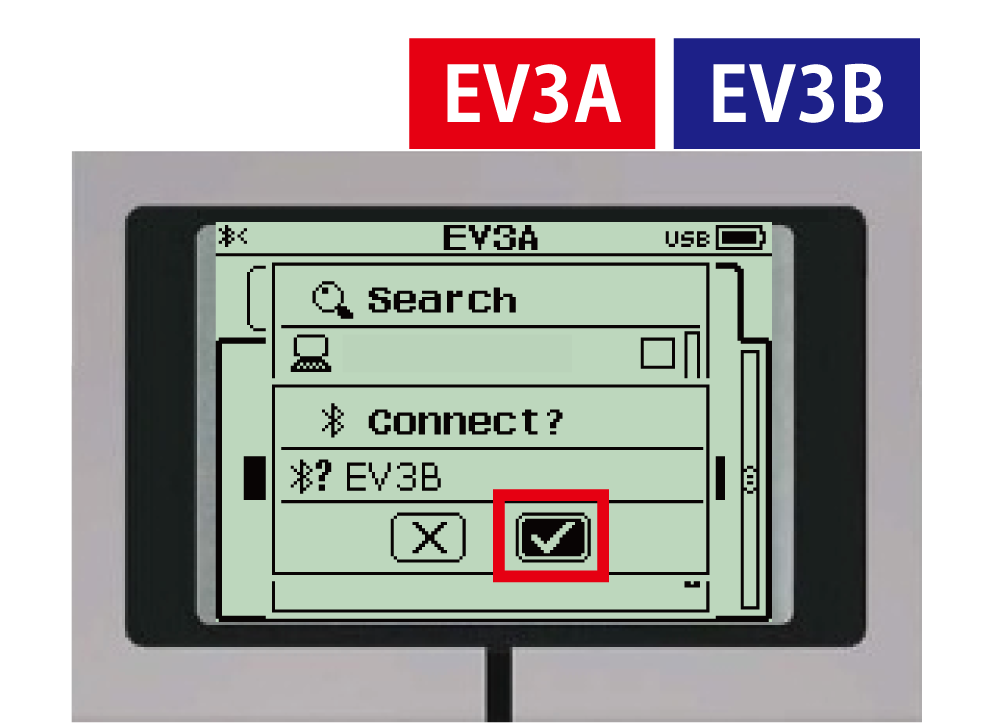
決定する。
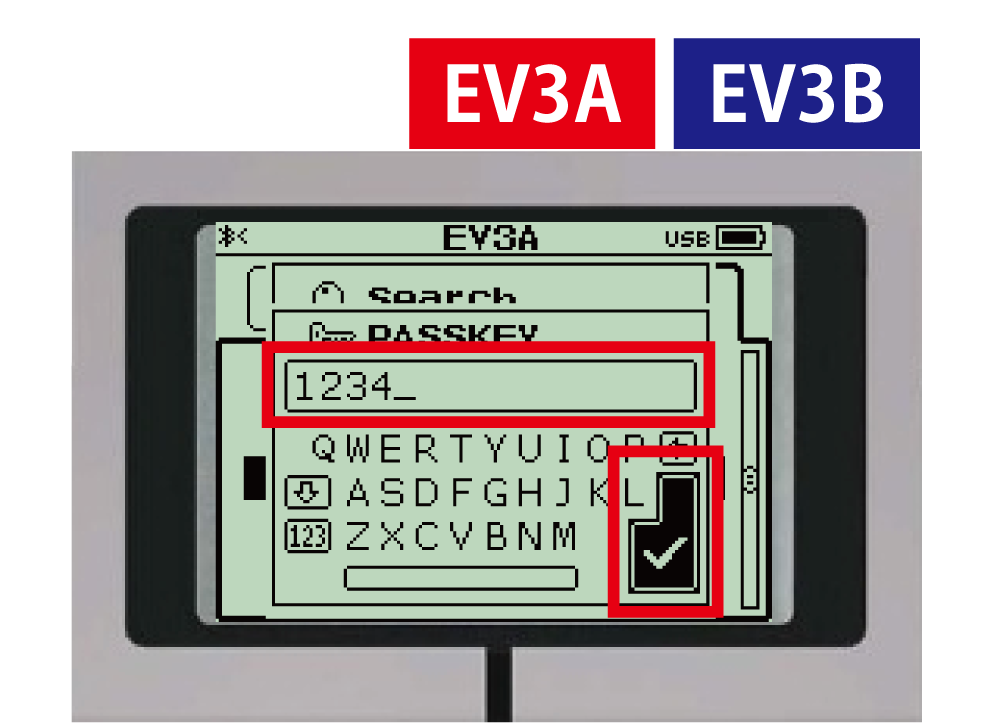
⑧パスキーを入力し(初期設定は「1234」)、「✓」を選んで決定する。
⑨「Connected!」と表示されたら「✓」を選択する。
◇サンプルプログラム
「EV3A」・「EV3B」それぞれのプログラムを作成します。
下図は、「EV3A」と「EV3B」の間で、Bluetooth通信を用いてメッセージをやりとりする簡単なプログラムです。
![]()
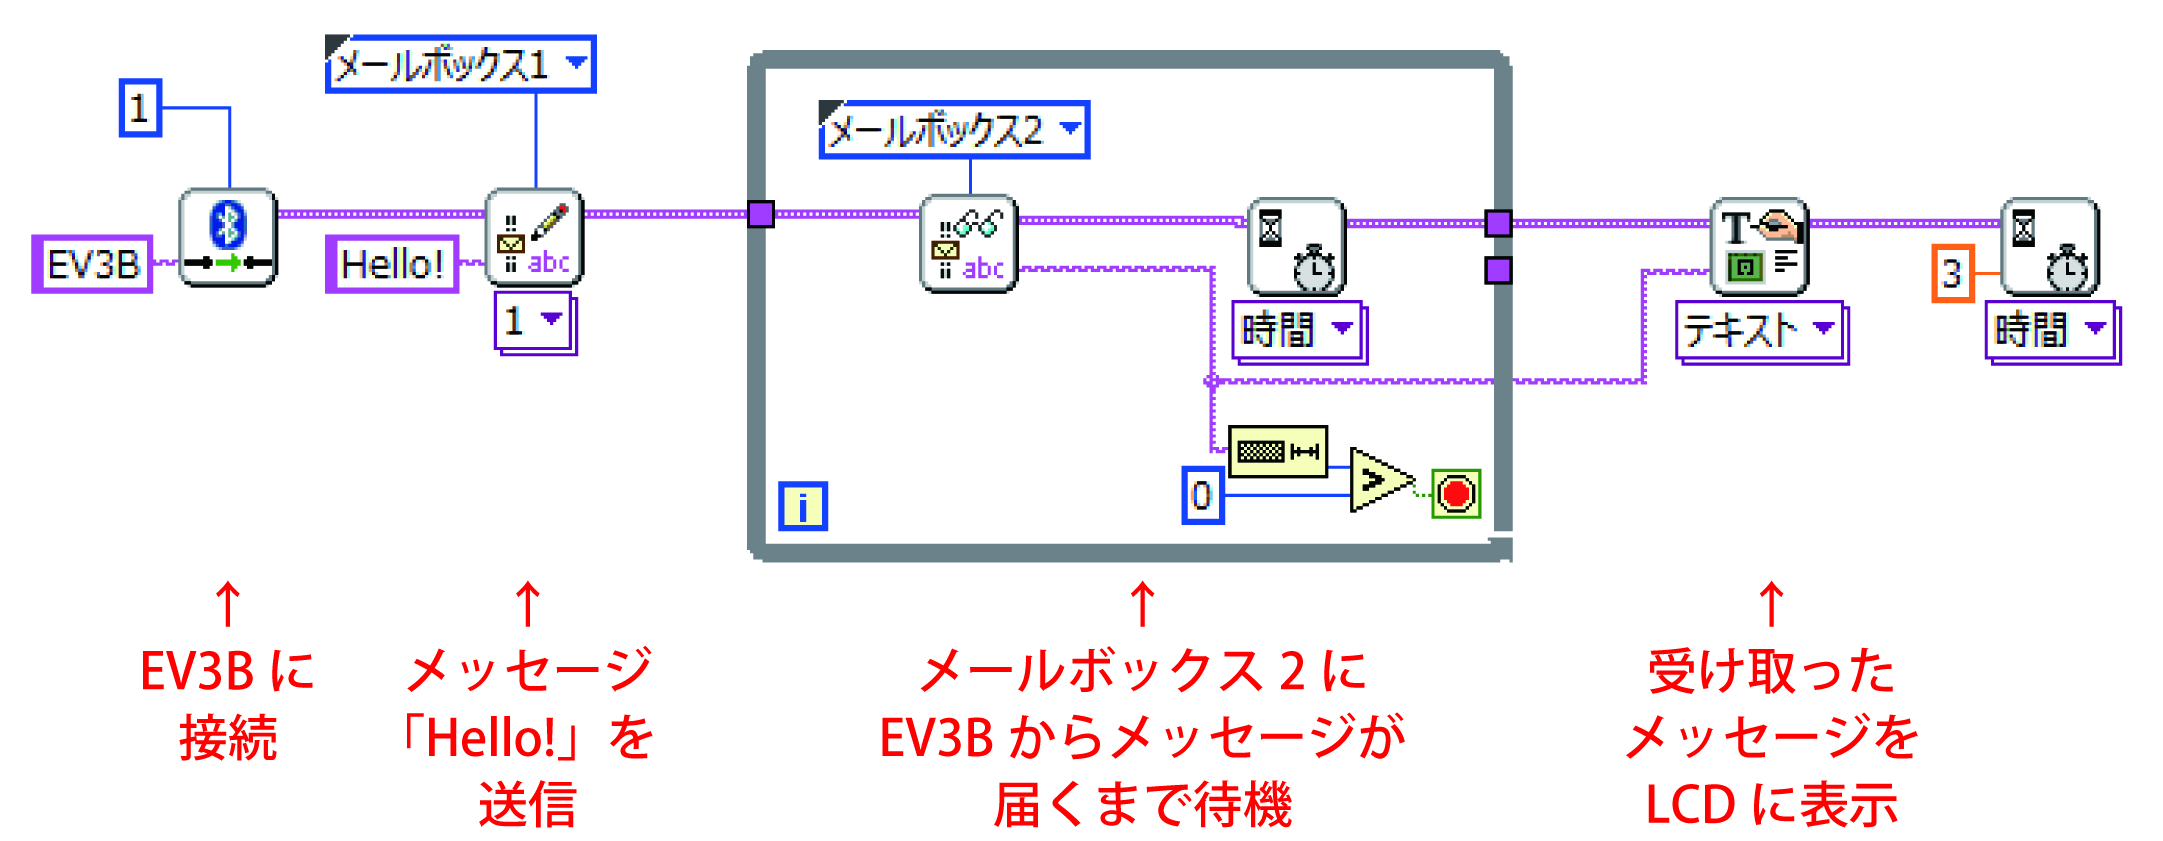
「EV3A」は「EV3B」にBluetooth接続し、メールボックス1を使って「EV3B」にメッセージ「Hello!」を送信します。その後、メールボックス2に「EV3B」からメッセージが届くまで待機します。メールボックス2にメッセージが届いたかどうかは、メールボックスのメッセージの文字列の長さで判断しています。メッセージが届いたら、それをLCDに表示します。
![]()
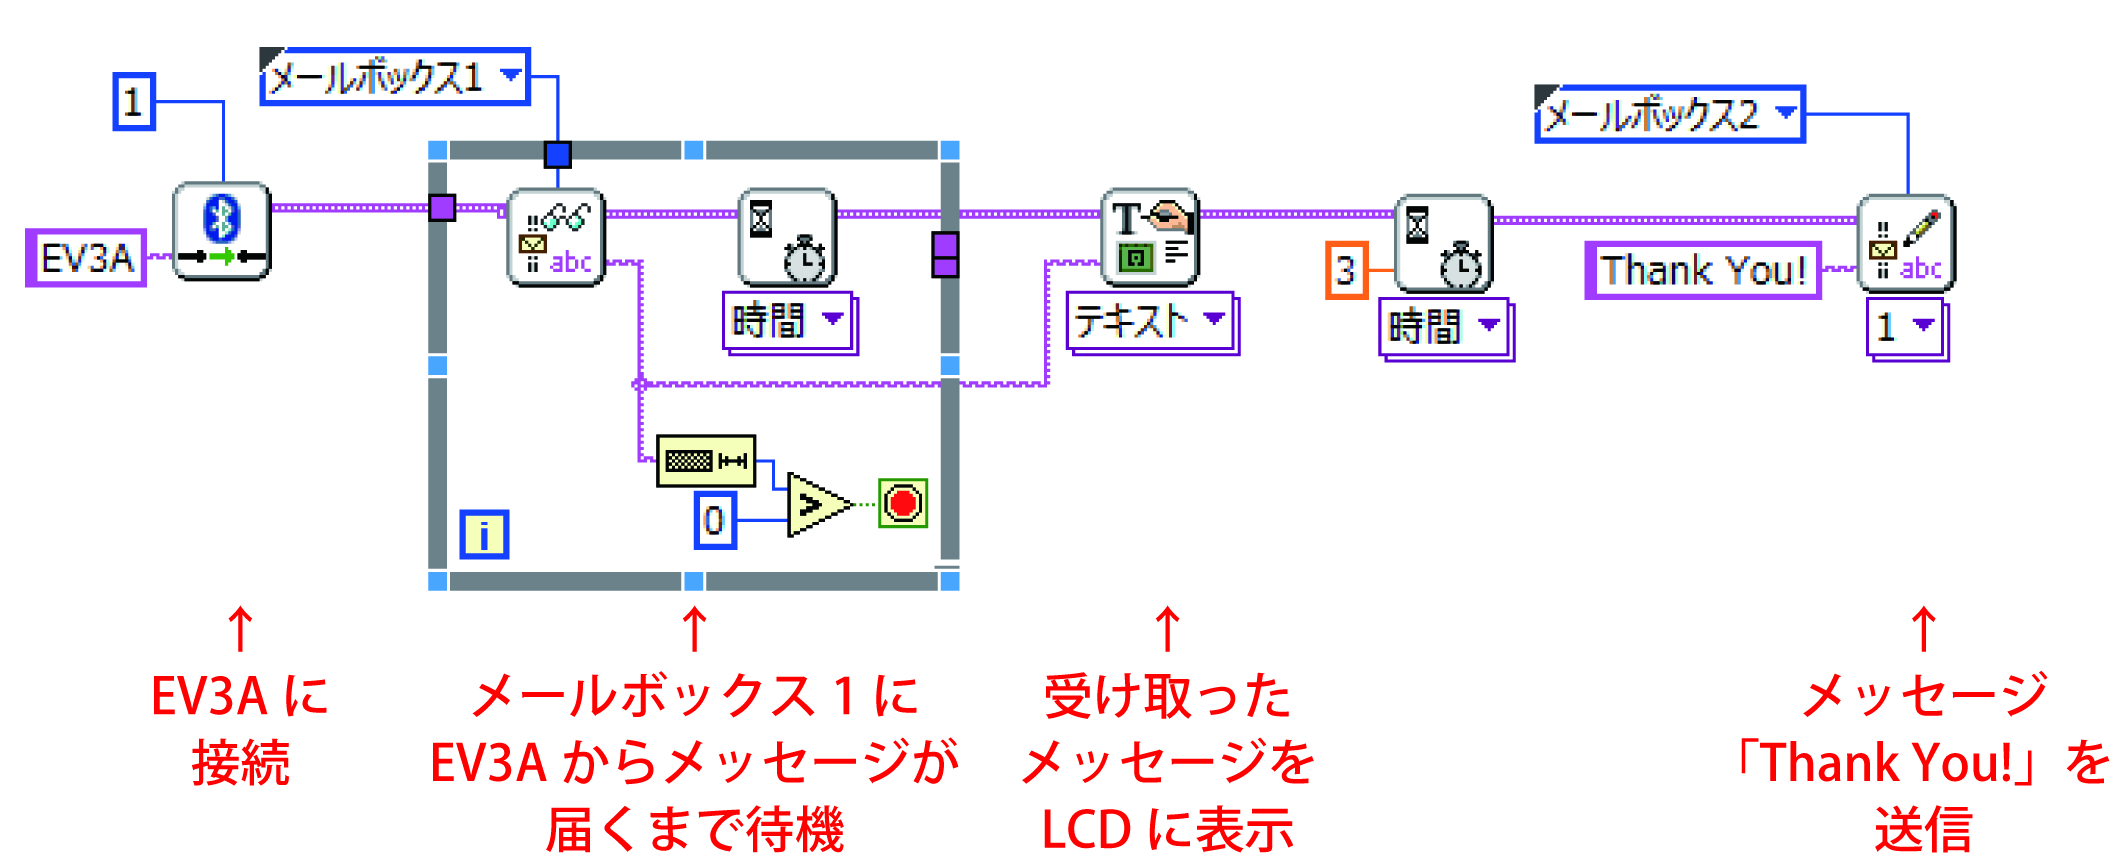
「EV3B」は「EV3A」にBluetooth接続し、メールボックス1に「EV3A」からメッセージが届くまで待機します。
メッセージが届いたら、それをLCDに表示し、メールボックス2を使って「EV3A」にメッセージ「Thank You!」を送信します。